Drawing text
OPENRNDR comes with support for rendering bitmap text. There are two modes of operation for writing text, a direct mode that simply writes a string of text at the requested position, and a more advanced mode that can place texts in a designated text area.
As an alternative to bitmap texts, which are stored as an image containing characters rendered at a specific size, it is also possible to obtain glyph contours to draw texts at any scale and to query curve properties.
Simple text rendering
To render simple texts we first make sure a font is loaded and assigned to drawer.fontMap, we then use drawer.text to draw the text.
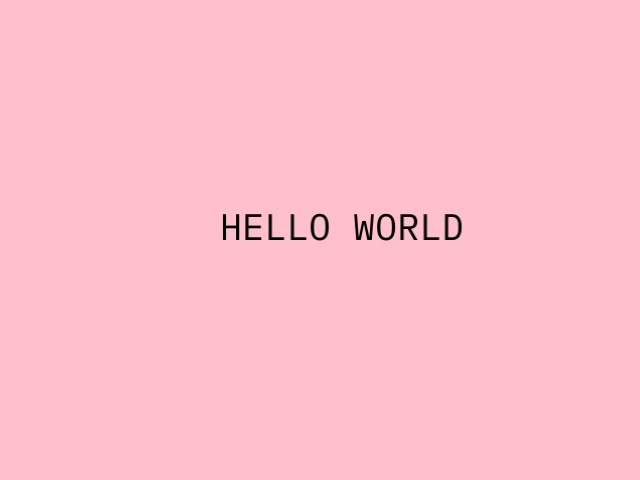
import org.openrndr.application
import org.openrndr.color.ColorRGBa
import org.openrndr.color.rgb
import org.openrndr.draw.font.loadFace
import org.openrndr.draw.loadFont
import org.openrndr.extra.shapes.rectify.rectified
import org.openrndr.extra.textwriter.writer
import org.openrndr.shape.LineSegment
import org.openrndr.shape.Rectangle
import kotlin.math.cos
import kotlin.math.sin

fun main() = application {
    program {
        val font = loadFont("data/fonts/default.otf", 48.0)
        extend {
            drawer.clear(ColorRGBa.PINK)
            drawer.fontMap = font
            drawer.fill = ColorRGBa.BLACK
            drawer.text(
                "HELLO WORLD",
                width / 2.0 - 100.0,
                height / 2.0
            )
        }
    }
}
Advanced text rendering
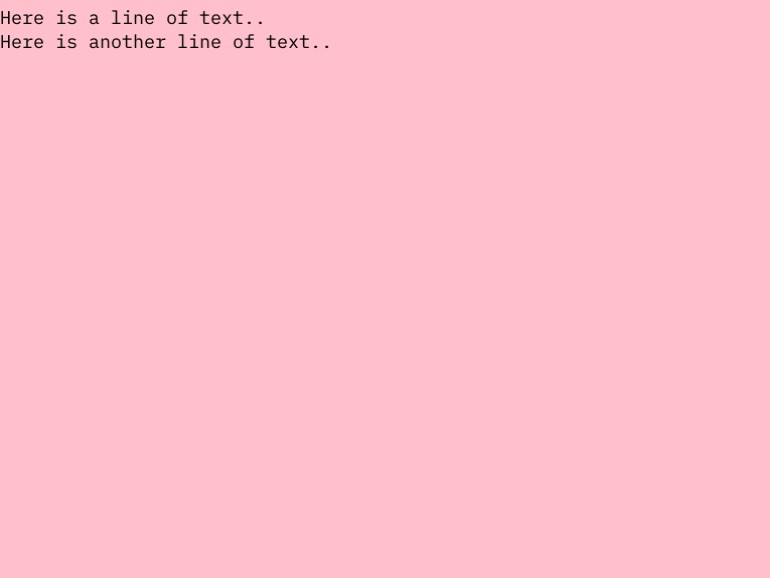
OPENRNDR comes with a Writer class that allows for basic typesetting. The Writer tool is based on the concept of text box and a cursor.
Its use is easiest demonstrated through an example:
import org.openrndr.application
import org.openrndr.color.ColorRGBa
import org.openrndr.color.rgb
import org.openrndr.draw.font.loadFace
import org.openrndr.draw.loadFont
import org.openrndr.extra.shapes.rectify.rectified
import org.openrndr.extra.textwriter.writer
import org.openrndr.shape.LineSegment
import org.openrndr.shape.Rectangle
import kotlin.math.cos
import kotlin.math.sin

fun main() = application {
    configure {
        width = 770
        height = 578
    }
    program {
        val font = loadFont("data/fonts/default.otf", 24.0)
        extend {
            drawer.clear(ColorRGBa.PINK)
            drawer.fontMap = font
            drawer.fill = ColorRGBa.BLACK

            writer {
                newLine()
                text("Here is a line of text..")
                newLine()
                text("Here is another line of text..")
            }
        }
    }
}
Specifying the text area
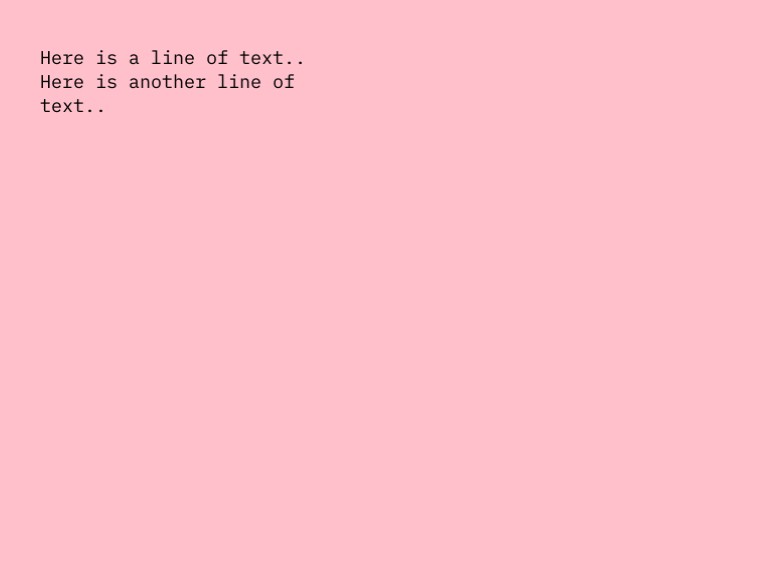
The box field of Writer is used to specify where text should be written. Let’s set the text area 40 pixels smaller than the drawer bounds.
We see that the text is drawn with margins around it. A second copy of the text uses horizontalAlign and verticalAlign for bottom-right alignment. Use a value of 0.5 for centered text.
import org.openrndr.application
import org.openrndr.color.ColorRGBa
import org.openrndr.color.rgb
import org.openrndr.draw.font.loadFace
import org.openrndr.draw.loadFont
import org.openrndr.extra.shapes.rectify.rectified
import org.openrndr.extra.textwriter.writer
import org.openrndr.shape.LineSegment
import org.openrndr.shape.Rectangle
import kotlin.math.cos
import kotlin.math.sin

fun main() = application {
    configure {
        width = 770
        height = 578
    }
    program {
        val font = loadFont("data/fonts/default.otf", 24.0)
        extend {
            drawer.clear(ColorRGBa.PINK)
            drawer.fontMap = font
            drawer.fill = ColorRGBa.BLACK

            writer {
                box = drawer.bounds.offsetEdges(-40.0)
                text(
                    listOf(
                        "Here is a line of text..",
                        "Here is another line of text.."
                    )
                )
            }

            writer {
                box = drawer.bounds.offsetEdges(-40.0)
                horizontalAlign = 1.0
                verticalAlign = 1.0
                text(
                    listOf(
                        "Here is a line of text..",
                        "Here is another line of text.."
                    )
                )
            }
        }
    }
}
Text properties
Text tracking -the horizontal space between characters- and leading -the vertical space between lines- can be set using Writer.style.leading and Writer.style.tracking.
import org.openrndr.application
import org.openrndr.color.ColorRGBa
import org.openrndr.color.rgb
import org.openrndr.draw.font.loadFace
import org.openrndr.draw.loadFont
import org.openrndr.extra.shapes.rectify.rectified
import org.openrndr.extra.textwriter.writer
import org.openrndr.shape.LineSegment
import org.openrndr.shape.Rectangle
import kotlin.math.cos
import kotlin.math.sin

fun main() = application {
    configure {
        width = 770
        height = 578
    }
    program {
        val font = loadFont("data/fonts/default.otf", 24.0)
        extend {
            drawer.clear(ColorRGBa.PINK)
            drawer.fontMap = font
            drawer.fill = ColorRGBa.BLACK

            writer {
                // -- animate the text leading
                leading = cos(seconds) * 20.0 + 24.0
                // -- animate the text tracking
                tracking = sin(seconds) * 20.0 + 24.0
                box = Rectangle(40.0, 40.0, width - 80.0, height - 80.0)
                newLine()
                text("Here is a line of text..")
                newLine()
                text("Here is another line of text..")
                newLine()
                text("Let's even throw another line of text in, for good measure! yay")
            }
        }
    }
}
Working with text contours
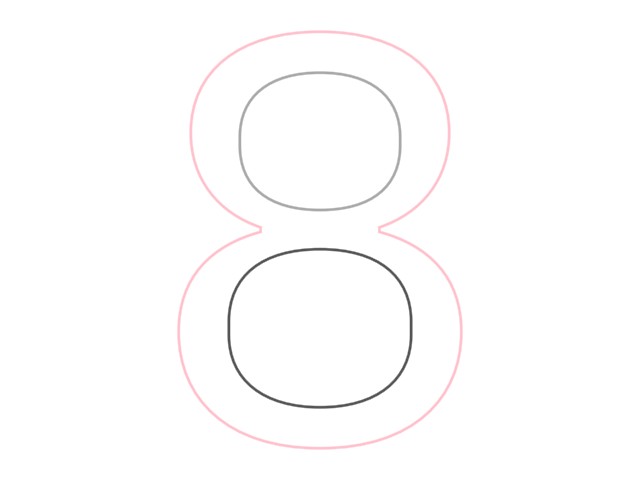
To load the vector data of a font file use the loadFace() method, then call the .glyphForCharacter() method to obtain a Shape representing a character.
import org.openrndr.application
import org.openrndr.color.ColorRGBa
import org.openrndr.color.rgb
import org.openrndr.draw.font.loadFace
import org.openrndr.draw.loadFont
import org.openrndr.extra.shapes.rectify.rectified
import org.openrndr.extra.textwriter.writer
import org.openrndr.shape.LineSegment
import org.openrndr.shape.Rectangle
import kotlin.math.cos
import kotlin.math.sin

fun main() = application {
    program {
        val face = loadFace("data/fonts/default.otf")
        val shape = face.glyphForCharacter(character = '8').shape(scale = 1.0)

        extend {
            drawer.clear(ColorRGBa.WHITE)
            // Center the shape on the screen
            drawer.translate(drawer.bounds.center - shape.bounds.center)

            drawer.fill = null
            drawer.strokeWeight = 2.0

            // Draw each contour found in the character '8' with a different color
            shape.contours.forEachIndexed { i, it ->
                drawer.stroke = listOf(ColorRGBa.PINK, rgb(0.33), rgb(0.66))[i]
                drawer.contour(it)
            }
        }
    }
}
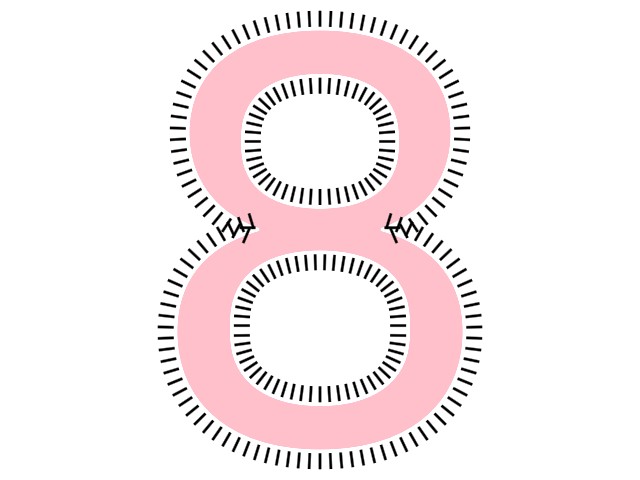
This example visualizes normal vectors around the contour of the character ‘8’, evenly spaced every 10 pixels.
import org.openrndr.application
import org.openrndr.color.ColorRGBa
import org.openrndr.color.rgb
import org.openrndr.draw.font.loadFace
import org.openrndr.draw.loadFont
import org.openrndr.extra.shapes.rectify.rectified
import org.openrndr.extra.textwriter.writer
import org.openrndr.shape.LineSegment
import org.openrndr.shape.Rectangle
import kotlin.math.cos
import kotlin.math.sin

fun main() = application {
    program {
        val face = loadFace("data/fonts/default.otf")
        val shape = face.glyphForCharacter('8').shape(1.0)

        // Map each contour in the shape to a list of LineSegment,
        // then combine the resulting lists by calling `.flatten()`.
        val normals = shape.contours.map { c ->
            // Work with rectified contours so `t` values are evenly spaced.
            val rc = c.rectified()
            val stepCount = (c.length / 10).toInt()
            List(stepCount) {
                val t = it / stepCount.toDouble()
                LineSegment(
                    rc.position(t) + rc.normal(t) * 5.0,
                    rc.position(t) + rc.normal(t) * 20.0
                )
            }
        }.flatten()
        extend {
            drawer.clear(ColorRGBa.WHITE)
            drawer.translate(drawer.bounds.center - shape.bounds.center)

            drawer.fill = ColorRGBa.PINK
            drawer.stroke = null
            drawer.shape(shape)

            drawer.stroke = ColorRGBa.BLACK
            drawer.strokeWeight = 2.0
            drawer.lineSegments(normals)
        }
    }
}