Generating pen plotter art
A pen plotter is a computer output device that can draw with a pen (or a brush, marker, etc) on a paper. Some such devices move the pen in the X and Y axes, while others can move the paper instead.
Pen plotters were introduced in the 1950s and 60s and have become popular among artists since the mid 2000s.
Unlike other output devices like ink-jet and laser printers which accept pixels, pen plotters must be fed with vector data: lines and curves.
OPENRNDR provides a rich toolset to generate and manipulate vector data.
SVG vs G-code
There are two main file formats used to send designs to pen plotters:
- SVG (Scalable Vector Graphics), used with devices like the AxiDraw / NextDraw.
- G-code, often supported by older plotters, CNC devices and laser cutters.
OPENRNDR can easily load, manipulate, generate and save SVG files to be plotted with devices like the AxiDraw / NextDraw. Such files can then be loaded into the Inkscape design program to be sent to the pen-plotter using a plugin.
Starting with orx version 0.5.0, two new modules are available to facilitate interacting with hardware pen plotters:
-
orx-axidraw provides a GUI to control and configure the AxiDraw / NextDraw device, removing the Inkscape requirement.
-
orx-g-code can be used to convert designs into G-code format, which can then be sent to a pen-plotter, a laser cutter or a CnC device using another application.
We will demonstrate these different approaches below.
Creating an SVG file
This is one of the simplest programs we can write to produce an SVG file containing just a circle.
fun main() = application {
    program {
        val design = drawComposition {
            circle(drawer.bounds.center, 200.0)
        }
        design.saveToFile(File("data/design.svg"))
    }
}
The API in the composition drawer is almost identical to the one of the standard drawer: we can use methods like segment, contour, shape, circle, rectangle, etc.
Note: with OPENRNDR / ORX versions 0.4.5 and earlier you need to enable orx-composition and orx-svg in the build.gradle.kts file.
Interactively creating an SVG file
Lets take our simple program a step further and make it interactive. Our program will listen to mouse clicks and key presses. The design will be initially empty. Every time we click the mouse button we will add elements to it. By pressing the c key the design will be cleared so we can start over. Once we are happy with the design we can press the s key to save the design as an SVG file.
import org.openrndr.application
import org.openrndr.color.ColorRGBa
import org.openrndr.dialogs.saveFileDialog
import org.openrndr.extra.axidraw.Axidraw
import org.openrndr.extra.axidraw.PaperSize
import org.openrndr.extra.composition.composition
import org.openrndr.extra.composition.draw
import org.openrndr.extra.composition.drawComposition
import org.openrndr.extra.gcode.BasicGrblGenerator
import org.openrndr.extra.gcode.LayerMode
import org.openrndr.extra.gcode.Origin
import org.openrndr.extra.gcode.Plot
import org.openrndr.extra.gui.GUI
import org.openrndr.extra.noise.uniform
import org.openrndr.extra.svg.saveToFile
import org.openrndr.math.Vector2
import java.io.File

fun main() = application {
    program {
        // Create an empty composition
        val design = drawComposition { }

        // A function to draw concentric circles into the composition.
        fun addCircles(pos: Vector2) {
            design.draw {
                repeat(15) {
                    circle(pos, 1.0 + it * it)
                }
            }
        }

        // Draw the composition onto the window
        extend {
            drawer.clear(ColorRGBa.WHITE)
            drawer.fill = null
            drawer.composition(design)
        }

        // Generate a new design every time we click the mouse
        mouse.buttonDown.listen {
            addCircles(it.position)
        }
        keyboard.keyDown.listen {
            // Clear the design when pressing the `c` key
            if (it.name == "c") {
                design.clear()
            }
            // Show a save dialog when pressing the `s` key, then save the design
            // with the chosen file name into the selected folder.
            if (it.name == "s") {
                saveFileDialog(supportedExtensions = listOf("SVG" to listOf("svg"))) { file ->
                    design.saveToFile(file)
                }
            }
        }
    }
}
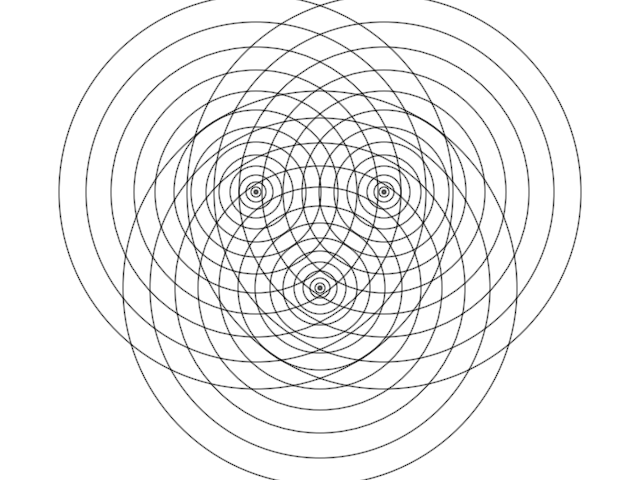
If we open the resulting design in a design program we will notice that the document size is 640 pixels wide and 480 pixels height, matching the default OPENRNDR window size. In most design programs we can choose a different document size (A4 for instance) then scale and re-center the design to fill the page.
Next, let’s take a look at how orx-axidraw can simplify plotting with AxiDraw / NextDraw devices.
orx-axidraw
What does orx-axidraw provide?
- A GUI to configure all AxiDraw / NextDraw pen-plotter parameters like pen vertical positions, pen speeds, and much more.
- Direct plotting from your OPENRNDR program.
- A 2D camera to position, scale and rotate your design in the paper before plotting.
- Simplified multi-pen plots by inserting pauses to switch pens.
- Saving and loading designs.
- Applying a margin around the edges of the paper.
To use orx-axidraw we need to add it as a dependency to our project’s build.gradle.kts file. Simply add implementation(orx.axidraw) inside the dependencies { } block and reload Gradle.
Let’s change the program we wrote above for interactively creating an SVG file to make use of orx-axidraw:
import org.openrndr.application
import org.openrndr.color.ColorRGBa
import org.openrndr.dialogs.saveFileDialog
import org.openrndr.extra.axidraw.Axidraw
import org.openrndr.extra.axidraw.PaperSize
import org.openrndr.extra.composition.composition
import org.openrndr.extra.composition.draw
import org.openrndr.extra.composition.drawComposition
import org.openrndr.extra.gcode.BasicGrblGenerator
import org.openrndr.extra.gcode.LayerMode
import org.openrndr.extra.gcode.Origin
import org.openrndr.extra.gcode.Plot
import org.openrndr.extra.gui.GUI
import org.openrndr.extra.noise.uniform
import org.openrndr.extra.svg.saveToFile
import org.openrndr.math.Vector2
import java.io.File

fun main() = application {
    program {
        // Instantiate orx-axidraw specifying the paper size in portrait mode.
        // Use `PaperSize.A5.size.yx` for landscape mode, or provide custom paper sizes
        // as a Vector2 in millimeters.
        val axi = Axidraw(this, PaperSize.A5.size)

        // Create a GUI and add the the controls provided by orx-axidraw
        val gui = GUI()
        gui.add(axi)

        // A function to draw concentric circles into the composition.
        fun addCircles(pos: Vector2) {
            axi.draw {
                repeat(15) {
                    circle(pos, 1.0 + it * it)
                }
            }
        }

        // Activate the GUI
        extend(gui)
        extend {
            drawer.clear(ColorRGBa.WHITE)
            // Draw the design held by orx-axidraw on the program window
            axi.display(drawer)
        }

        // Generate a new design every time we click the mouse
        mouse.buttonDown.listen {
            addCircles(it.position)
        }
        keyboard.keyDown.listen {
            // Clear the design when pressing the `c` key
            if (it.name == "c") {
                axi.clear()
            }
            // No need to add a saving option here:
            // orx-axidraw adds saving and loading GUI buttons by default
        }
    }
}
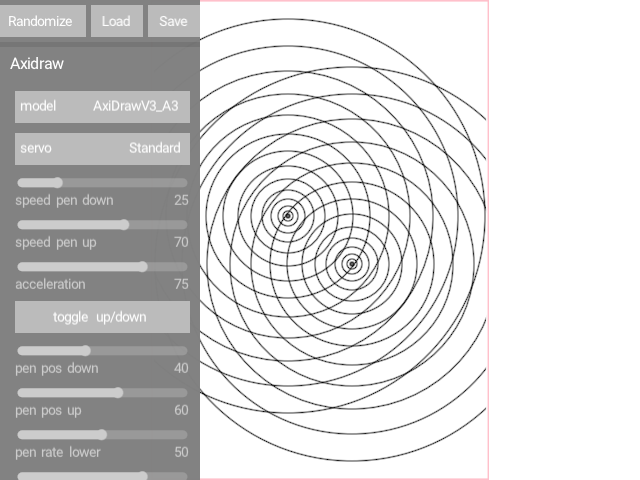
To learn more about orx-axidraw, study the demos it provides.
orx-g-code
Most laser-cutters, CnC devices and pen-plotters use the G-code vector file format. This includes larger pen-plotters by Bantam Tools, the company behind the NextDraw devices. Let’s take a look at how we can output G-code files using orx-g-code.
The first step is to add orx-g-code as a dependency to our project’s build.gradle.kts file. To do so, add implementation(orx.g.code) inside the dependencies { } block and reload Gradle.
Here is a third version of the earlier interactive program, this time outputting G-code when the g key is pressed:
import org.openrndr.application
import org.openrndr.color.ColorRGBa
import org.openrndr.dialogs.saveFileDialog
import org.openrndr.extra.axidraw.Axidraw
import org.openrndr.extra.axidraw.PaperSize
import org.openrndr.extra.composition.composition
import org.openrndr.extra.composition.draw
import org.openrndr.extra.composition.drawComposition
import org.openrndr.extra.gcode.BasicGrblGenerator
import org.openrndr.extra.gcode.LayerMode
import org.openrndr.extra.gcode.Origin
import org.openrndr.extra.gcode.Plot
import org.openrndr.extra.gui.GUI
import org.openrndr.extra.noise.uniform
import org.openrndr.extra.svg.saveToFile
import org.openrndr.math.Vector2
import java.io.File

fun main() = application {
    program {
        // Instantiate Plot specifying the paper size in millimeters.
        val plot = Plot(
            dimensions = Vector2(148.0, 210.0), // A5 Portrait
            manualRedraw = false,
            origin = Origin.CENTER
        )

        extend(plot) {
            generator = BasicGrblGenerator()
            layerMode = LayerMode.SINGLE_FILE
            folder = "/tmp"
        }

        // A function to draw concentric circles into a layer
        // with a unique name.
        fun addCircles(pos: Vector2) {
            plot.layer("layer_${plot.layers.size}") {
                strokeWeight = 0.5
                repeat(15) {
                    circle(pos, 1.0 + it * it)
                }
            }
        }

        // Generate a new design every time we click the mouse
        mouse.buttonDown.listen {
            addCircles(plot.toDocumentSpace(it.position))
        }
        run {
            addCircles(plot.docBounds.position(0.2, 0.2))
            addCircles(plot.docBounds.position(0.8, 0.8))
        }
        keyboard.keyDown.listen {
            // Clear the design when pressing the `c` key
            if (it.name == "c") {
                plot.layers.clear()
            }
            // Press "g" to export G-code to /tmp.
            // (implemented by Plot)
        }
    }
}
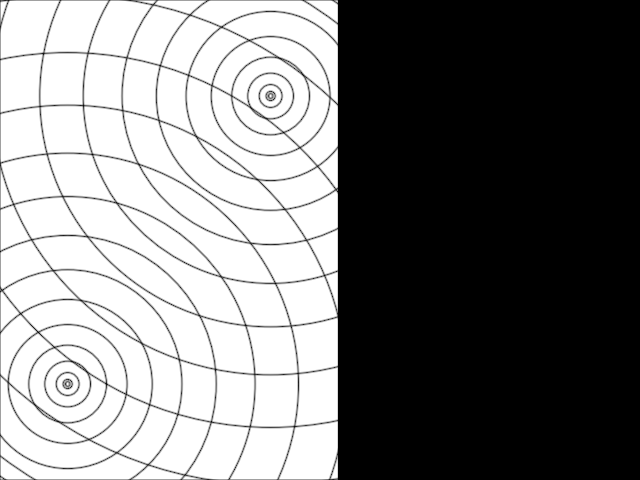
The beginning of the resulting text file looks like this:
G21
G90
;begin layer: layer_0
;begin shape
G0 X-45.4 Y-63.0
M3 S255
G1 X-45.344 Y-63.401 F500.0
G1 X-44.801 Y-63.944 F500.0
G1 X-43.999 Y-63.944 F500.0
G1 X-43.456 Y-63.401 F500.0
G1 X-43.456 Y-62.599 F500.0
G1 X-43.999 Y-62.056 F500.0
G1 X-44.801 Y-62.056 F500.0
G1 X-45.344 Y-62.599 F500.0
M3 S0
;end shape
;begin shape
G0 X-46.4 Y-63.0
M3 S255
G1 X-46.288 Y-63.802 F500.0
G1 X-45.202 Y-64.888 F500.0
...
To send the output to your hardware device, you have two main options:
- Controller software (recommended): load the file into a tool like VisiCut or a GRBL sender. This is generally safer because controller software lets you set working bounds, position, scale, and rotate your design before plotting.
- Direct serial communication: send the raw G-code stream directly over a serial port.
Warning: Hardware devices interpreting G-code usually do not perform boundary validation. If you stream commands directly to a machine, ensure all coordinates stay within physical limits.
To learn more about orx-g-code, study the demos it provides.
Tips
Find more tips on using OPENRNDR with pen plotters in the forum.